Interfacing Pushbutton - Arduino
The pushbutton is a component that connects two points in a circuit when you press it. When the pushbutton is open (undressed) there is no connection between the two legs of the pushbutton, so the pin is connected to 5 volts (through the pull-up resistor) and we read a HIGH. When the button is closed (pressed), it makes a connection between its two legs, connecting the pin to ground, so that we read a LOW. (The pin is still connected to 5 volts, but the resistor in-between them means that the pin is "closer" to ground.)
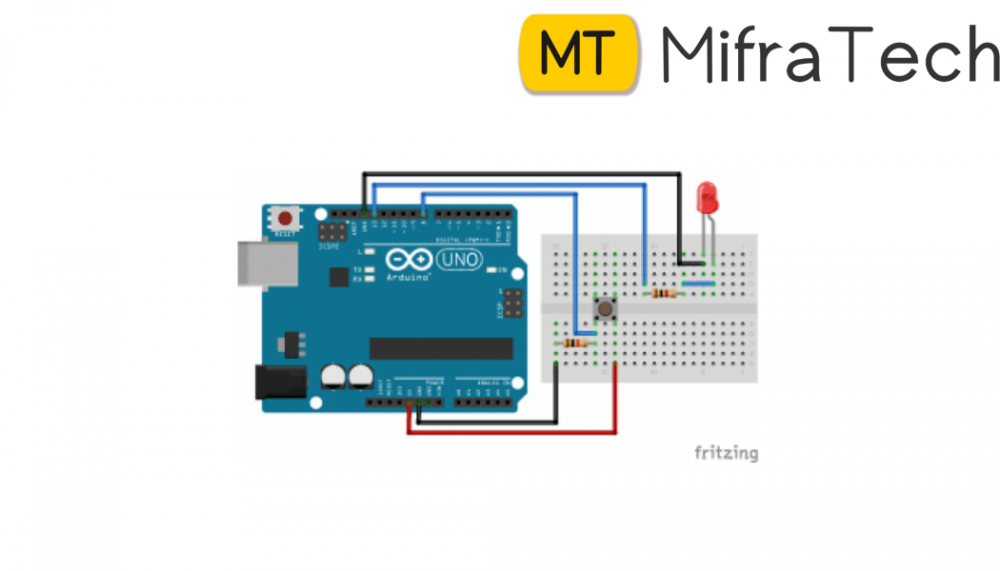
1. Arduino UNO
2. Breadboard
3. Pushbutton
4. Resistor
5. Jumper wire
Connect three wires to the board. The first goes from one leg of the pushbutton through a pull-down resistor (here 10k ohm) to ground. The second goes from the corresponding leg of the pushbutton to the 5 volt supply. The third connects to a digital I/O pin (here pin 2) which reads the button's state.
For more interesting projects connect with me on
For More Details Contact +919972364704
https://www.mifratech.com/public/
https://www.facebook.com/mifratech.lab
https://www.instagram.com/mifratech/
https://twitter.com/mifratech